AboutContact

UIImage from URL with Swift

UIImage from URL tutorial: If you are new in Swift for iOS 8 and you want to load an image in a UIImage view from URL, then you are in the right place. In this tutorial you'll learn how to load an UIImage from URL with Swift.

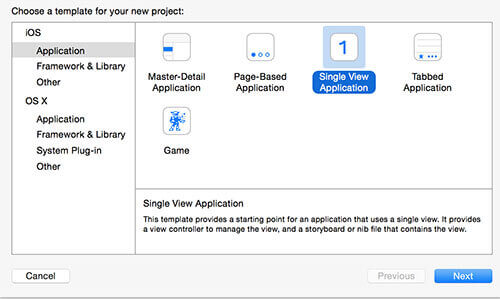
Create a new single view swift project for iOS.

Create new single view project in swift

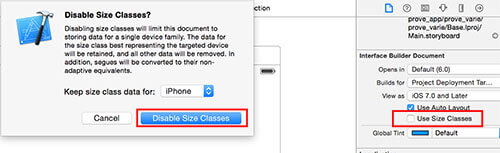
 From the Main.storyboard you can for simplicity turn off the use size classes option.

Swift disable use Size Classes

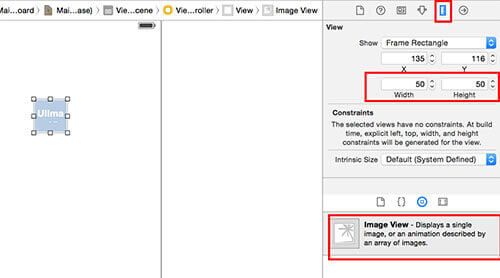
Now you can add, inside the view in the Main.storyboard, the Image view element. Once added the UIImage component, you can click on it and access on the size inspector section. Here, under the view section, you can set the frame rectangles to a size of 50 x 50. In the screenshot below I've highlighted where to find the size inspector and the section where to edit the width and the height of the UIImage component. 

UIImage set image size in Swift

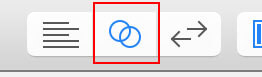
Now the code part can begin. The first thing you've to do is to connect the UIImage element that you've previously added to a variable. In this way you can access to the UIImage component directly through this variable. With the Main.storyboard opened just click on the assistant editor. It's the button posed on the right-top defined by the two circles I've reported in the figure below.

Swift Assistant Editor

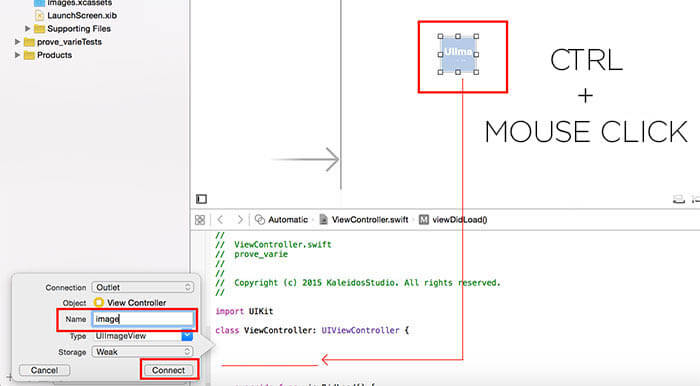
The assistant editor is a great tool that allows you to conenct a UI component to a variable or to an action. Once pressed, the view will split into two parts. The one on the top is your Main.storyboard, while on the bottom the view controller part will be displayed. The View Controller is the class that is called as a first thing when your application is starting. By pressing the CTRL button, you can click on the UIImage component in the Main.storyboard and with your mouse you've to drag your mouse to the bottom part of the screen, just above the viewDidLoad function. Once released the mouse, you can type the variable name and press Connect.

Swift Connect component

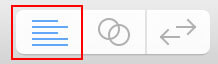
Now you can exit from the assistant editor by pressing the button on the left of the assistant editor.

Swift code button

You can now open the ViewController.swift class and write the load_image function. The image_element variable is the name of the variable you've previously choosen to connect the element. This function call the iOS sendAsynchronousRequest function that performs a background asyncronous request.  

func load_image(urlString:String)
{

     var imgURL: NSURL = NSURL(string: urlString)!
     let request: NSURLRequest = NSURLRequest(URL: imgURL)
     NSURLConnection.sendAsynchronousRequest(
                   request, queue: NSOperationQueue.mainQueue(),
                   completionHandler: {(response: NSURLResponse!,data: NSData!,error: NSError!) -> Void in
         if error == nil {
               self.image_element.image = UIImage(data: data)
         }
    })

}


You can now load the image in the viewDidLoad function by writing:

load_image("https://www.kaleidosblog.com/tutorial/kaleidosblog.png")


You can download the code for this example here.

UPDATE: download the swift 2 code example from here

Leave a comment


Comments


- 09 November 2017 at 13:07
its a awesome tut sir tq so much
- 19 February 2016 at 19:47
NSURLConnection's sendAsynchronousRequest has been deprecated since iOS 9.0 Use NSURLSession's dataTaskWithRequest instead
Andrea - 19 February 2016 at 19:51
Hi, thank you for your comment. You are right, the tutorial has been written for ios 8 and adapted by mantaining the same function for ios 9. I'll write a new tutorial using the NSURLSession method. Thank you again.
Matt - 20 February 2016 at 03:40
Cool, yeah just wanted to give a heads-up. Thanks for the post!
- 22 January 2016 at 06:44
i want to save profile photo and get profile from using url ... pls help me
Andrea - 22 January 2016 at 19:55
Hi, do you want to download and display multiple images in one page? Consider to use a listview or an uicollectionview to display your images. Check this tutorial here: https://www.kaleidosblog.com/uicollectionview-image-gallery-download-and-display-images-inside-the-cell
- 16 December 2015 at 14:03
It'll be so helpful if u do an example because i'm in the learning stage
Andrea - 17 December 2015 at 20:26
In the next days I'll write the new tutorial about this. I'll inform you with an email when it is ready! :-)
Maha - 21 December 2015 at 07:47
Okay Andrea. Thanks in advance
Andrea - 22 December 2015 at 21:35
Here it is. Hope it helps! https://www.kaleidosblog.com/uicollectionview-image-gallery-download-and-display-images-inside-the-cell
- 16 December 2015 at 11:07
It works great.. is there any way to implement multiple images from url using uicollectionview instead of individual image in Xcode 7 swift 2.0
Andrea - 16 December 2015 at 13:42
Hi, you've to call the load image function for each cell. You can also define an array to cache the downloaded images, in order to avoid to download the images multiple times while scrolling. If you need I'll do an example for you.
- 22 November 2015 at 21:12
Hey Andrea, thanks!!
- 25 September 2015 at 23:40
code doesn't compile with swift 2
Andrea - 26 September 2015 at 14:43
Hi, thank you for your comment. Here you can download the updated version: https://www.kaleidosblog.com/tutorial/uiimage_from_url_swift_2.zip thank you again
- 07 May 2015 at 10:27
Oh yes that looks definitely cleaner! Sorry to keep bothering you here, but how do I transform them into buttons?
Andrea - 07 May 2015 at 15:07
Hi Victor, you can do it in two ways. 1. turn on the user interaction enabled option for the uiimage and add the UITapGestureRecognizer to the image. 2. Insert a UIButton instead of UIImage, set the button background using this code button.setImage(UIImage(data: data), forState: .Normal) and link the IBAction event. If you need an example with the two solutions just tell me.
- 04 May 2015 at 17:48
How can I use this for multiple (12) images? Seems like this needs one function per image?
Andrea - 04 May 2015 at 21:10
Hi, thank you for your comment. You have to pass as a parameter of the load_image function also the UIImage reference. In this way as soon as the image is loaded you have the image reference in order to be able to directly assign it. So just a function, multiple call :). If you need, I prepare for you an example.
victordonker - 05 May 2015 at 10:45
If you would like to, please! Or just have a look at this: http://pastebin.com/RyKA83N3 Is this about what you meant?
Andrea - 05 May 2015 at 11:06
Yes, or also by passing directly the UIImage variable, here an example: https://www.kaleidosblog.com/tutorial/example.txt
When dealing with a lot of elements of the same type, you can also use a collection view!
victordonker - 05 May 2015 at 12:03
Thanks a lot. Guess this might be helpful for the UIConnection View: http://www.raywenderlich.com/78550/beginning-ios-collection-views-swift-part-1 Will check out both soon!
Andrea - 05 May 2015 at 12:12
Hi Victor, ok you're welcome! Yes, the site you've linked could be usefull, but soon I'll write a tutorial about this topic, so stay tuned! :-)
victordonker - 05 May 2015 at 18:27
I can't really get the example.txt to work, can you elaborate on this? I actually don't need this grid overview, building a vertical scroll view with larger cards/images, kinda like the App Bar. Any experience with this by any chance?
Andrea - 05 May 2015 at 19:14
Here you can find the zip project example that downloads multiple images: https://www.kaleidosblog.com/tutorial/multiple_images.zip


AboutContactPrivacy